Ensuring continuous availability for web services requires resilient architecture, precise configuration, and active health monitoring—far beyond simply “running a web server.” This article presents a formal, end-to-end approach to implementing a high-availability web tier using HAProxy as a load balancer in front of multiple NGINX reverse proxy nodes, including conceptual framing, a concise executive summary, and a complete step-by-step deployment guide.
Introduction to the architecture
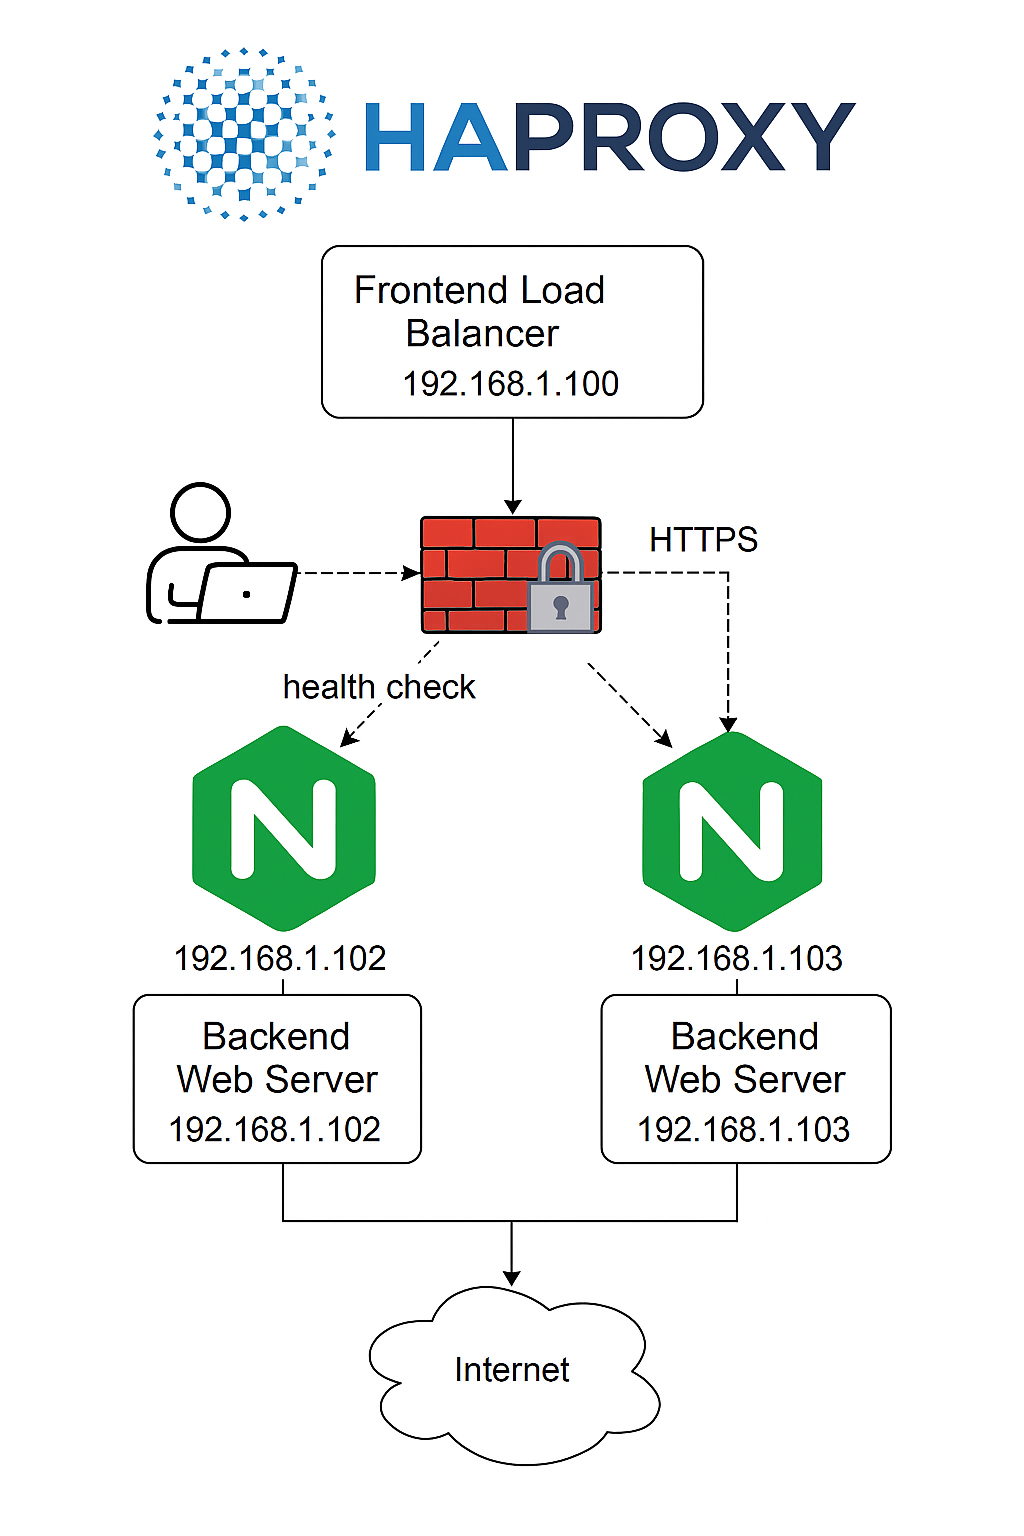
High-availability web architectures commonly place a highly efficient load balancer in front of multiple reverse proxy/web server nodes to distribute traffic, detect failures, and maintain service continuity. HAProxy provides robust Layer 4 and Layer 7 load balancing with health checks and operational visibility, while NGINX offers advanced application-layer capabilities such as HTTP/2/3, caching, and security features to optimize modern application delivery. In this design, HAProxy accepts client traffic on port 80 (and optionally 443) and balances requests across two or more NGINX instances, each capable of serving content and proxying to upstream applications.
Executive summary
- Objective: Implement a fault-tolerant web tier that maintains service availability during node failures and scales horizontally with demand.
- Core components:
- HAProxy: Front-end load balancer with health checks, statistics, and flexible policies.
- NGINX: Reverse proxy/web server supporting modern protocols, security features (e.g., WAF options), and performance optimizations.
- Outcomes:
- Resilience: Automatic failover when a backend becomes unavailable through active health checks.
- Performance: Reduced latency and improved delivery using NGINX’s optimized HTTP stack and protocol support.
- Visibility: Live statistics and status pages from HAProxy enable operational insights, including session rates and server health states.
Prerequisites and reference topology
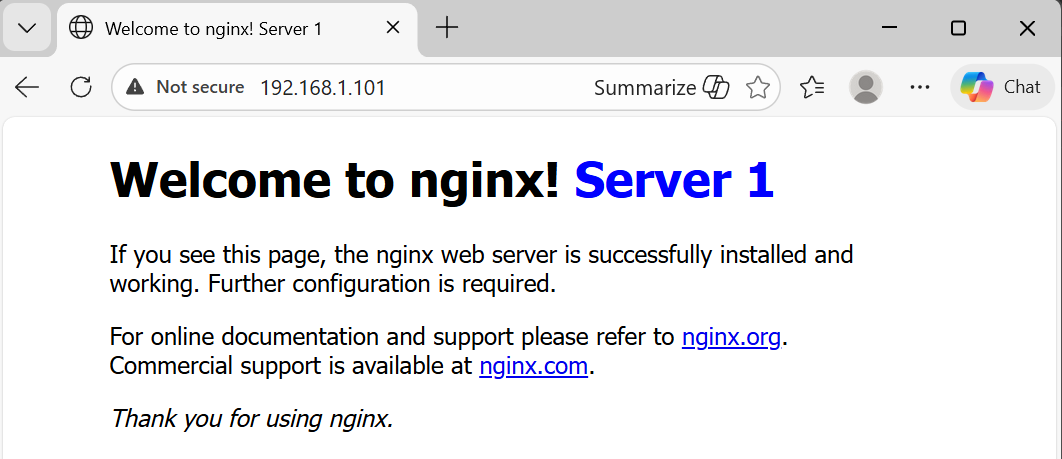
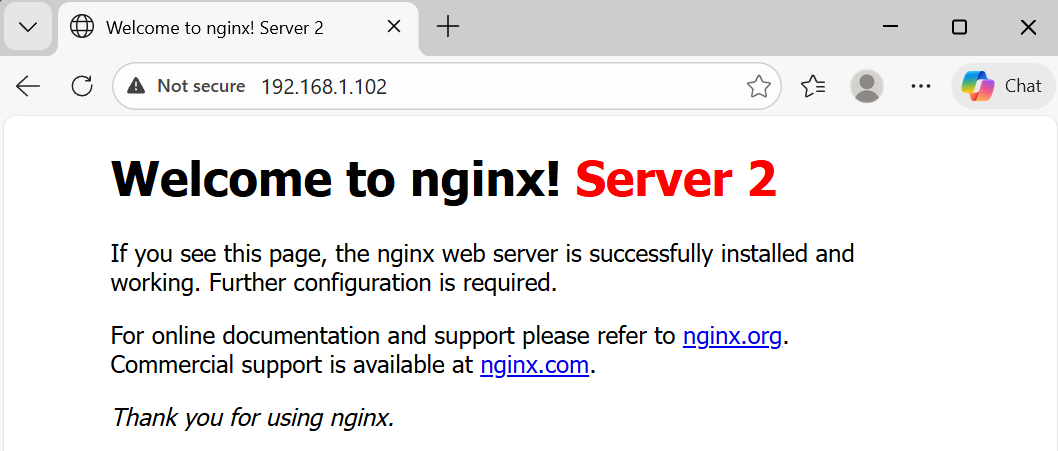
- Environment: Ubuntu 24.04 LTS on virtual or physical hosts with one HAProxy node (e.g., 192.168.1.100) and at least two NGINX nodes (e.g., 192.168.1.101 and 192.168.1.102). NGINX deployment can be verified via its default “Welcome to nginx! Server 1 or Welcome to nginx! Server 2” page prior to custom configuration.
- Design: HAProxy terminates client connections and distributes them (e.g., round robin) across NGINX backends. NGINX serves static content and/or proxies requests to upstream app services, leveraging modern protocols and security features to enhance delivery.
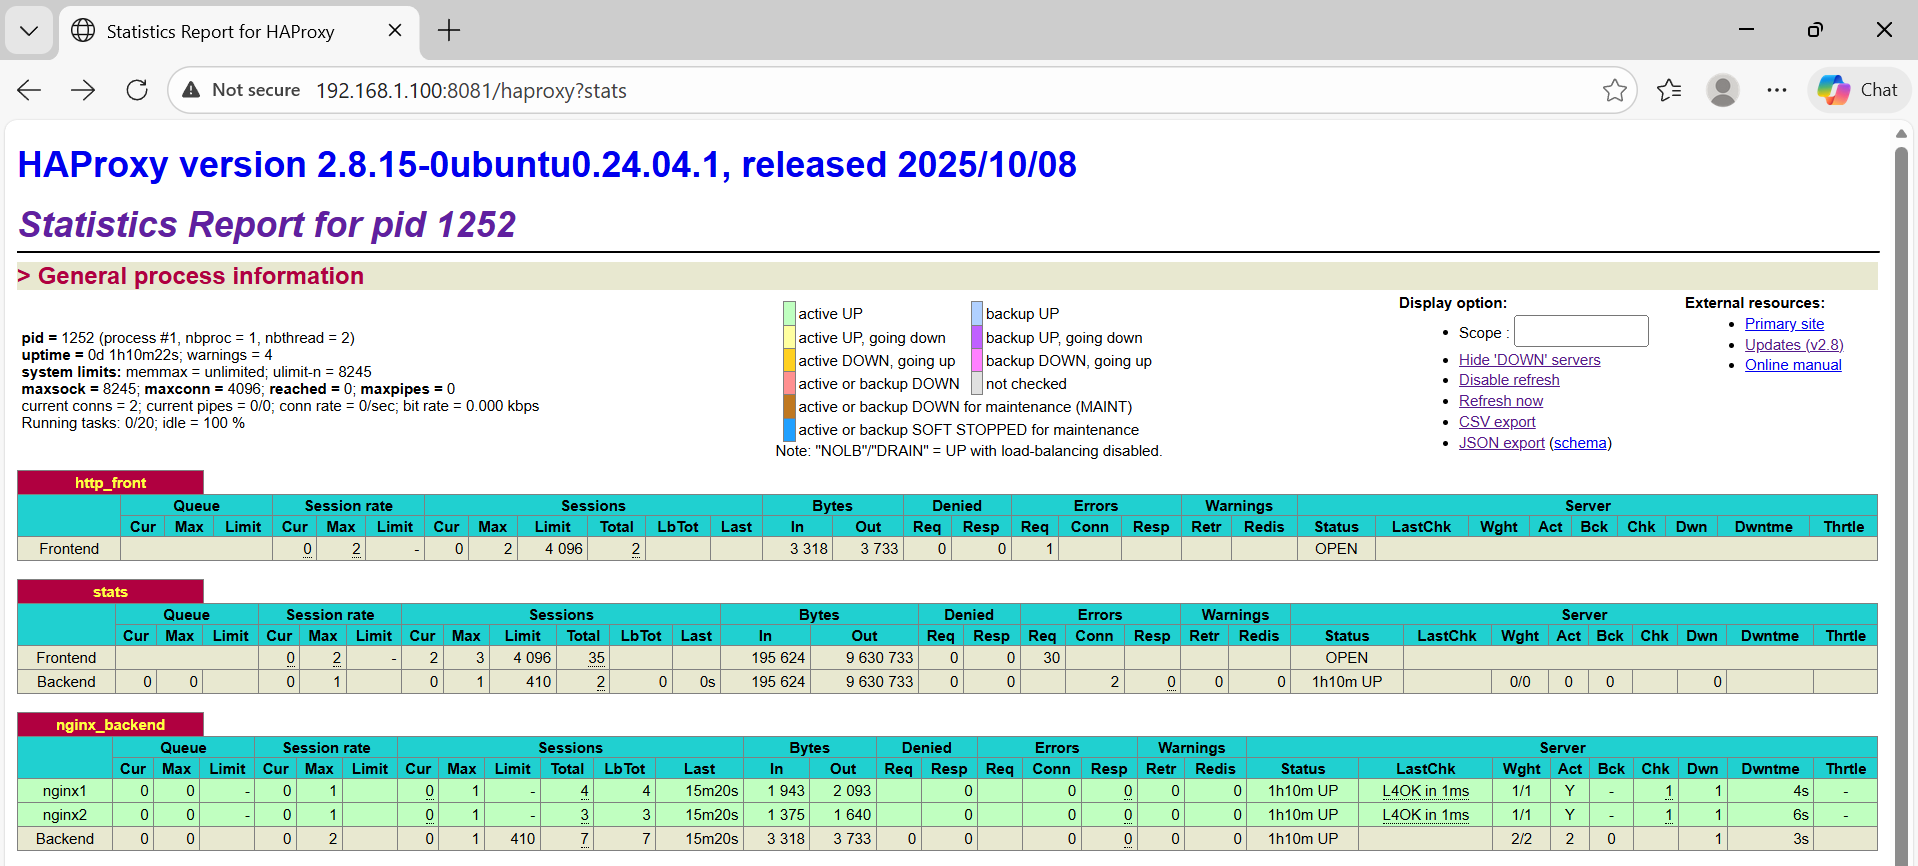
- Operational visibility: HAProxy statistics expose version, uptime, session metrics, and per-backend health status, facilitating validation and tuning during rollouts.
Step-by-step implementation
Fontend load balancer (192.168.1.100)
Open terminal and type command below to install HAProxy
|
1 2 |
sudo apt update sudo apt install haproxy nginx -y |
After installation successfully, navigate to /etc/haproxy$
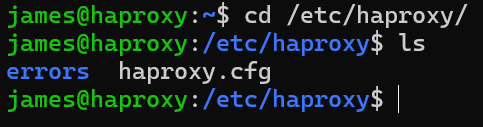
Edit file haproxy.cfg like the code below
|
1 2 3 4 5 6 7 8 9 10 11 12 13 14 15 16 17 18 19 20 21 22 23 24 25 26 27 28 29 |
global log /dev/log local0 maxconn 4096 user haproxy group haproxy defaults log global mode http option httplog option dontlognull timeout connect 5000ms timeout client 50000ms timeout server 50000ms frontend http_front bind 0.0.0.0:80 default_backend nginx_backend listen stats bind *:8081 stats enable stats uri /haproxy stats refresh 5s backend nginx_backend balance roundrobin server nginx1 192.168.1.101:80 check server nginx2 192.168.1.102:80 check |
Validate and restart HAProxy
|
1 2 |
sudo haproxy -f /etc/haproxy/haproxy.cfg -c sudo systemctl restart haproxy |

Configure NGINX on Backend Servers 1 (192.168.1.101)
Update and Install Required Packages
|
1 2 |
sudo apt update sudo apt install nginx |
Edit the default server block to return a unique response per host:

|
1 2 3 4 5 6 7 8 9 10 11 12 13 14 15 16 17 18 19 20 21 22 23 |
<!DOCTYPE html> <html> <head> <title>Welcome to nginx! Server 1</title> <style> html { color-scheme: light dark; } body { width: 35em; margin: 0 auto; font-family: Tahoma, Verdana, Arial, sans-serif; } </style> </head> <body> <h1>Welcome to nginx! <font color="blue">Server 1</font></h1> <p>If you see this page, the nginx web server is successfully installed and working. Further configuration is required.</p> <p>For online documentation and support please refer to <a href="http://nginx.org/">nginx.org</a>.<br/> Commercial support is available at <a href="http://nginx.com/">nginx.com</a>.</p> <p><em>Thank you for using nginx.</em></p> </body> </html> |
Configure NGINX on Backend Servers 2 (192.168.1.102)
Update and Install Required Packages
|
1 2 |
sudo apt update sudo apt install nginx |
|
1 2 3 4 5 6 7 8 9 10 11 12 13 14 15 16 17 18 19 20 21 22 23 |
<!DOCTYPE html> <html> <head> <title>Welcome to nginx! Server 2</title> <style> html { color-scheme: light dark; } body { width: 35em; margin: 0 auto; font-family: Tahoma, Verdana, Arial, sans-serif; } </style> </head> <body> <h1>Welcome to nginx! <font color="red">Server 2</font></h1> <p>If you see this page, the nginx web server is successfully installed and working. Further configuration is required.</p> <p>For online documentation and support please refer to <a href="http://nginx.org/">nginx.org</a>.<br/> Commercial support is available at <a href="http://nginx.com/">nginx.com</a>.</p> <p><em>Thank you for using nginx.</em></p> </body> </html> |
After installation, confirm NGINX is active by visiting the server’s IP; the default welcome page indicates a successful setup and forms the baseline for validation.
Backend Servers 1 (192.168.1.101)
Backend Servers 2 (192.168.1.102)
Verify Load Balancing and Health Checks
1. Client Access
- Open a web browser on the host computer or another virtual machine.
- Navigate to the HAProxy IP address (for example, http://192.168.1.100).
- If the configuration is correct, you will see a page served by one of the NGINX servers.
2. Load Balancing Test
Create distinct pages on each NGINX server, for example:
- NGINX1 (192.168.1.101): display the text “Welcome to nginx! Server 1”
- NGINX2 (192.168.1.102): display the text “Welcome to nginx! Server 2”
- Refresh the web browser several times.
- If load balancing is functioning correctly, the pages will alternately display “Welcome to nginx! Server 1” and “Welcome to nginx! Server 2.”
3. Health Check Test
Shut down one of the NGINX servers by running:
|
1 |
sudo systemctl stop nginx |
- Access the HAProxy IP address again.
- HAProxy will automatically redirect traffic to the NGINX server that remains active.
- You will not encounter any errors; instead, you will only see the page served by the active server.
4. Monitoring HAProxy
Access http://192.168.1.100:8081/haproxy?stats to view the status of the backend servers.
Jasa System Administrator Profesional
Saya menawarkan layanan instalasi dan konfigurasi yang komprehensif untuk mendukung kebutuhan infrastruktur IT Anda, meliputi:
- Web Server: instalasi dan optimasi server agar website berjalan stabil dan aman dengan menggunakan platform dari Apache & NGINX.
- Mail Server: instalasi dan email server seperti Microsoft 365, Carbonio (Zimbra), Google Workspace.
- Hosting Control Panel: pemasangan dan pengaturan panel hosting modern untuk memudahkan manajemen server.
- Content Management System (CMS): instalasi WordPress, Joomla, atau platform lain untuk pengelolaan konten yang efisien.
- Web Static Application : setup aplikasi berbasis web sesuai kebutuhan bisnis Anda.
- Migrasi Server/Website: pemindahan data dan aplikasi dengan aman tanpa downtime.
📩 Hubungi saya untuk konsultasi dan pemesanan layanan.
- Email : contact@mursidin.net