Odoo is a comprehensive and open-source Enterprise Resource Planning (ERP) platform designed to help organizations manage and integrate their core business processes efficiently. By offering a wide range of modular applications, Odoo enables businesses to streamline operations, improve productivity, and support data-driven decision-making within a single, unified system.
Odoo is an integrated ERP system that provides a comprehensive set of applications for managing various business functions within a single platform. This article aims to guide users through the fundamental concepts and practical steps required to effectively use Odoo, enabling a structured and efficient implementation process.
Article below begin by covering the installation process, followed by a detailed walkthrough of essential modules and practical tips to help you get started with Odoo efficiently.
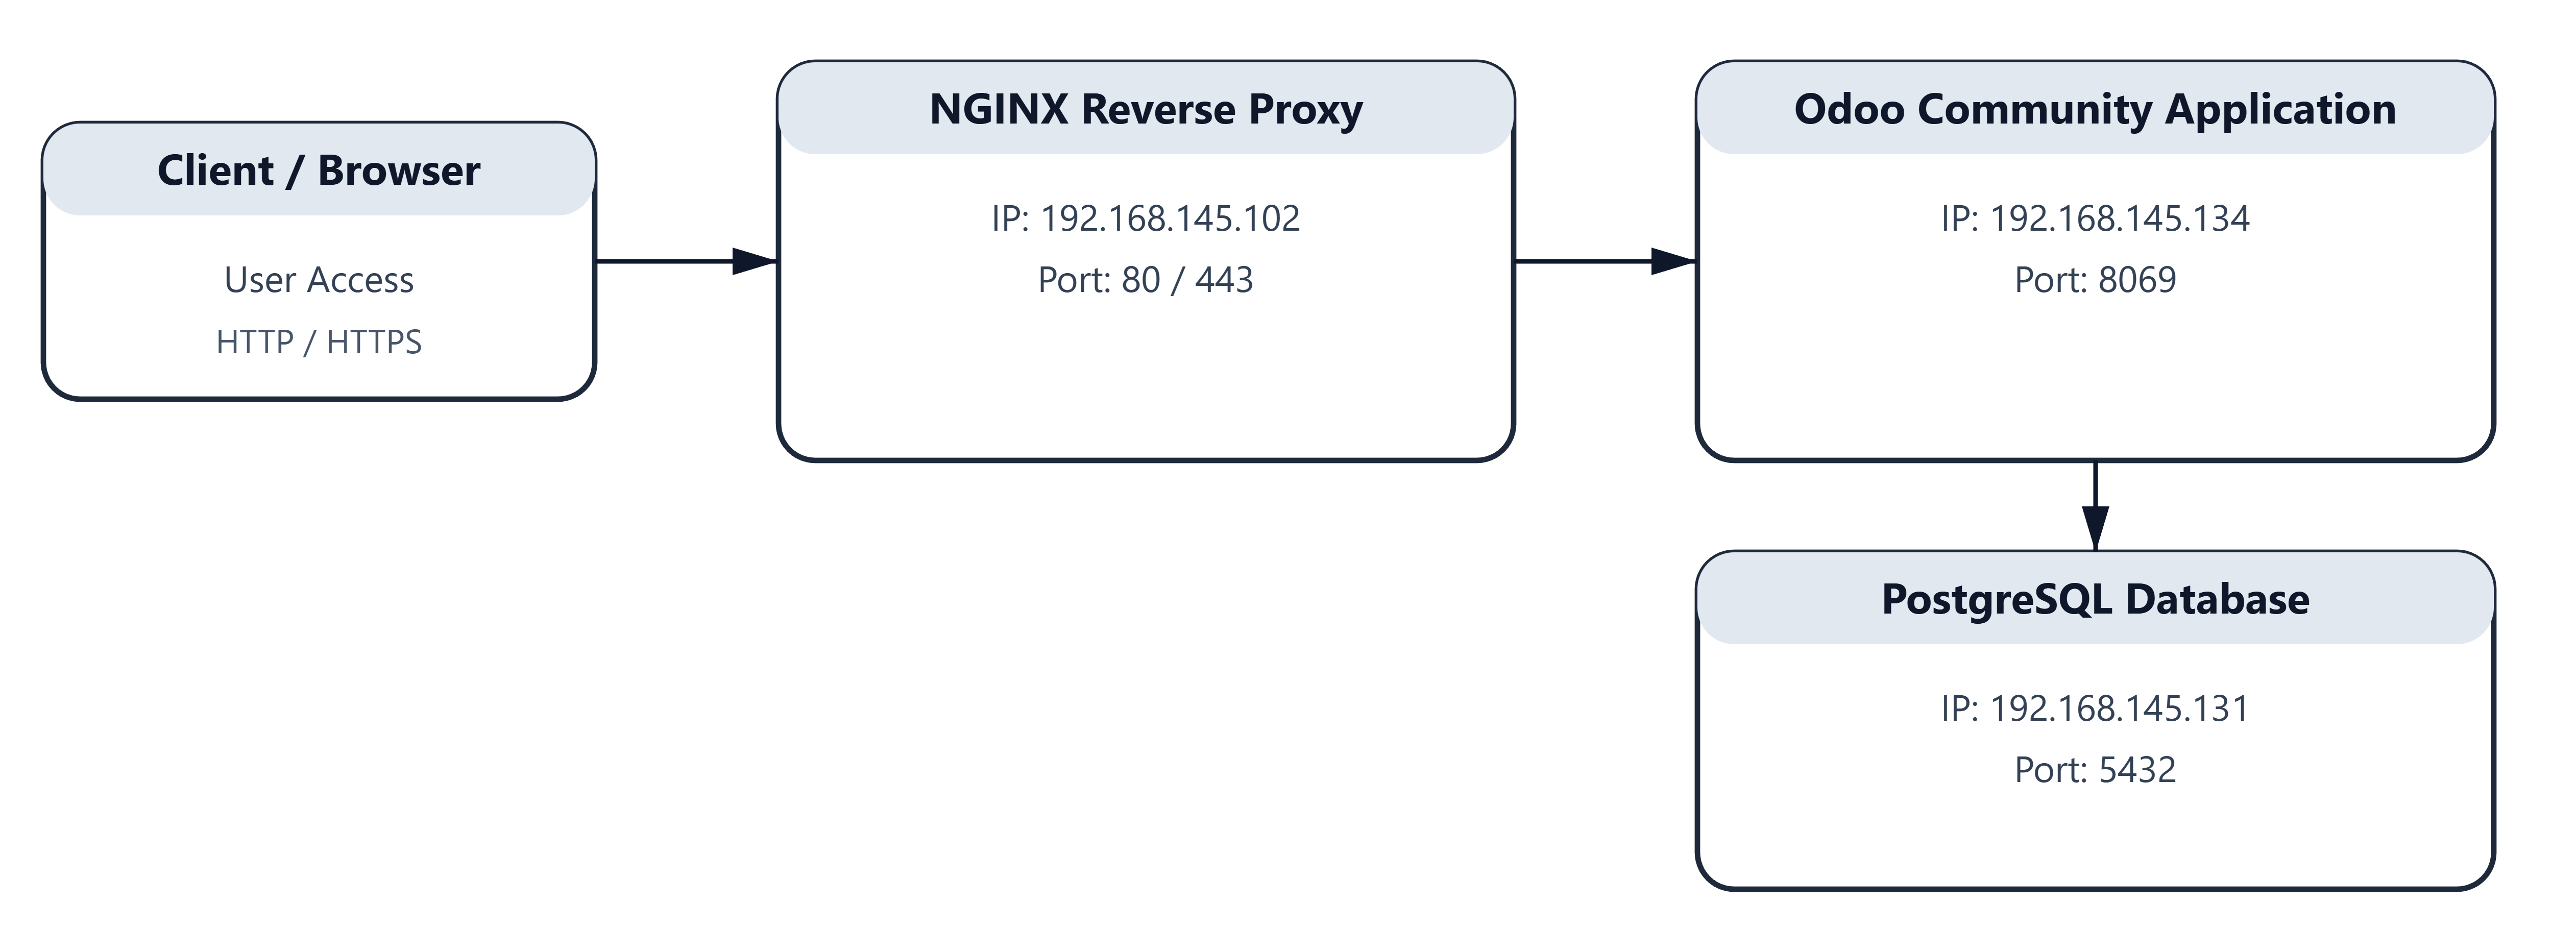
Diagram Topology
1. Initial Preparation (Apply to All Nodes)
The following steps must be performed on all nodes within the Odoo infrastructure environment to ensure system consistency, stability, and compatibility before proceeding with the installation.
1.1 Update Operating System Packages
Ensure that all system packages are up to date:
|
1 |
sudo apt update && sudo apt upgrade -y |
1.2 Configure System Time Zone
Set the system time zone to ensure consistent log timestamps and proper service synchronization:
|
1 |
sudo timedatectl set-timezone Asia/Makassar |
2. Install and Configure Database Node 1 (192.168.148.131)
PostgreSQL Database Server Installation
This node is dedicated to running PostgreSQL, which serves as the central database backend for the Odoo Community application.
2.1 Install PostgreSQL
Install PostgreSQL from the official Ubuntu repository:
|
1 2 |
sudo apt install -y postgresql systemctl status postgresql |
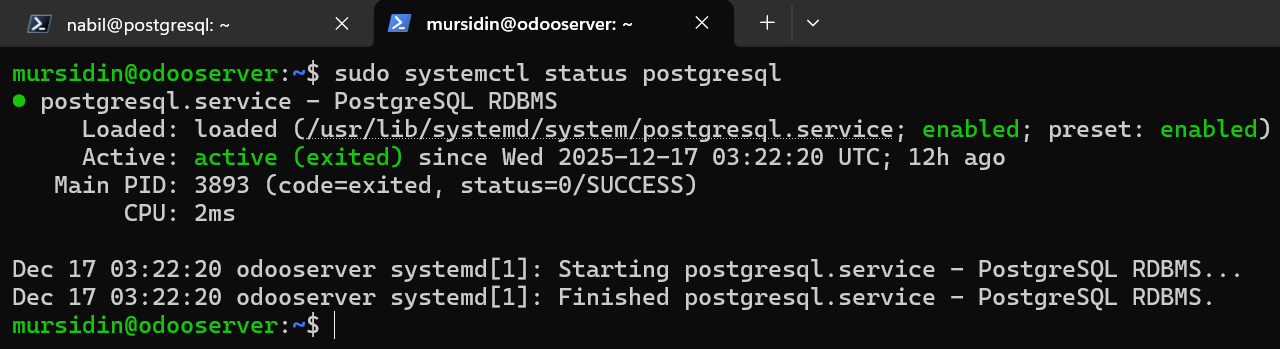
2.2 Verify PostgreSQL Service Status
Ensure that the PostgreSQL service is running properly:
|
1 |
sudo systemctl status postgresql |
The service status should display active (running).
2.3 Create a Dedicated Database User for Odoo
Log in to the PostgreSQL console as the postgres superuser:
|
1 |
sudo -u postgres psql |
Create a database user for Odoo and grant database creation privileges:
|
1 2 3 |
CREATE USER odoo WITH PASSWORD 'odoo123'; ALTER USER odoo CREATEDB; \q |
2.4 Configure PostgreSQL to Listen on Network Interfaces
Edit the PostgreSQL configuration file:
Edit konfigurasi PostgreSQL:
sudo nano /etc/postgresql/*/main/postgresql.conf
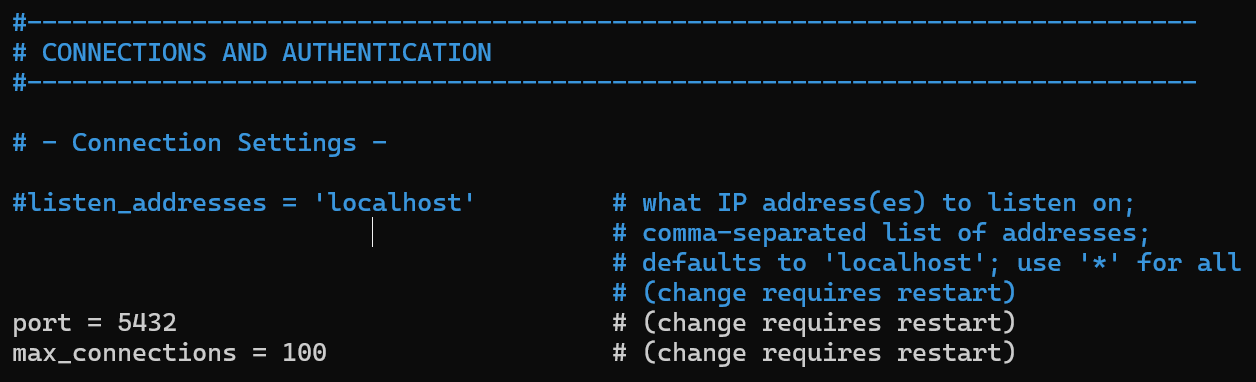
Modify the following parameter:
|
1 |
listen_addresses = '*' |
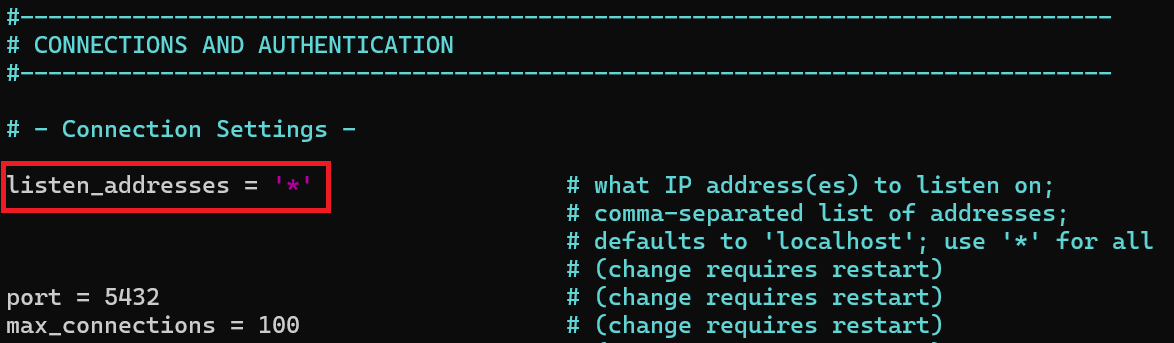
This allows PostgreSQL to accept connections from remote application servers.
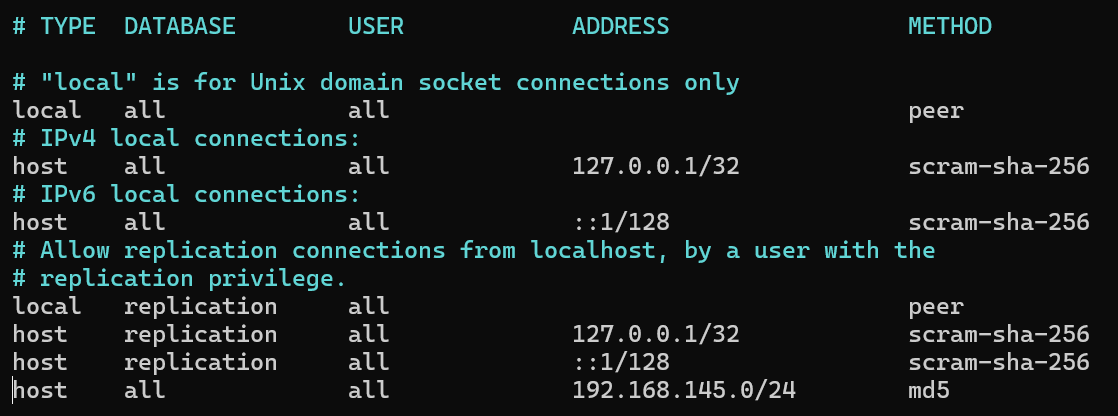
2.5 Configure Client Authentication
Edit the client authentication configuration file:
sudo nano /etc/postgresql/*/main/pg_hba.conf

Add the following rule to allow access from the internal network:
|
1 |
host all all 192.168.145.0/24 md5 |
2.6 Restart PostgreSQL Service
Apply the configuration changes by restarting PostgreSQL:
sudo systemctl restart postgresql
![]()
3. Instal Odoo Community Node 2 (192.168.145.131)
Install dependency
|
1 2 3 4 |
sudo apt install -y python3-pip python3-dev libpq-dev \ libxml2-dev libxslt1-dev libldap2-dev libsasl2-dev \ build-essential libjpeg-dev libssl-dev \ nodejs npm |
3.1 Install wkhtmltopdf
Odoo requires wkhtmltopdf to generate PDF reports (invoices, quotations, and other documents).
Install wkhtmltopdf using the official Ubuntu repository:
|
1 |
sudo apt install -y wkhtmltopdf |
3.2 Create Odoo System User
For security and operational best practices, Odoo must run under a dedicated system user.
Create the Odoo system user and group:
|
1 |
sudo adduser --system --home=/opt/odoo --group odoo |
This command will:
- Create a system user named odoo
- Set /opt/odoo as the home directory
- Create a dedicated group odoo
- Prevent interactive login for security purposes
3.3 Set Directory Ownership
Ensure that the Odoo directory is owned by the odoo user:
sudo su – odoo
sudo git clone https://www.github.com/odoo/odoo –branch 19.0 –depth 1 /opt/odoo/odoo
|
1 2 3 4 5 6 7 8 9 10 11 |
root@odooserver:/home/mursidin# git clone https://www.github.com/odoo/odoo --branch 19.0 --depth 1 /opt/odoo/odoo Cloning into '/opt/odoo/odoo'... warning: redirecting to https://github.com/odoo/odoo.git/ remote: Enumerating objects: 50401, done. remote: Counting objects: 100% (50401/50401), done. remote: Compressing objects: 100% (38193/38193), done. remote: Total 50401 (delta 14218), reused 29992 (delta 10376), pack-reused 0 (from 0) Receiving objects: 100% (50401/50401), 183.79 MiB | 2.05 MiB/s, done. Resolving deltas: 100% (14218/14218), done. Updating files: 100% (45190/45190), done. root@odooserver:/home/mursidin# |
3.5 Install Python Requirements
- Install Python Virtual Environment Package
Ensure the Python virtual environment module is installed:
- Activate the Virtual Environment
Activate the virtual environment:
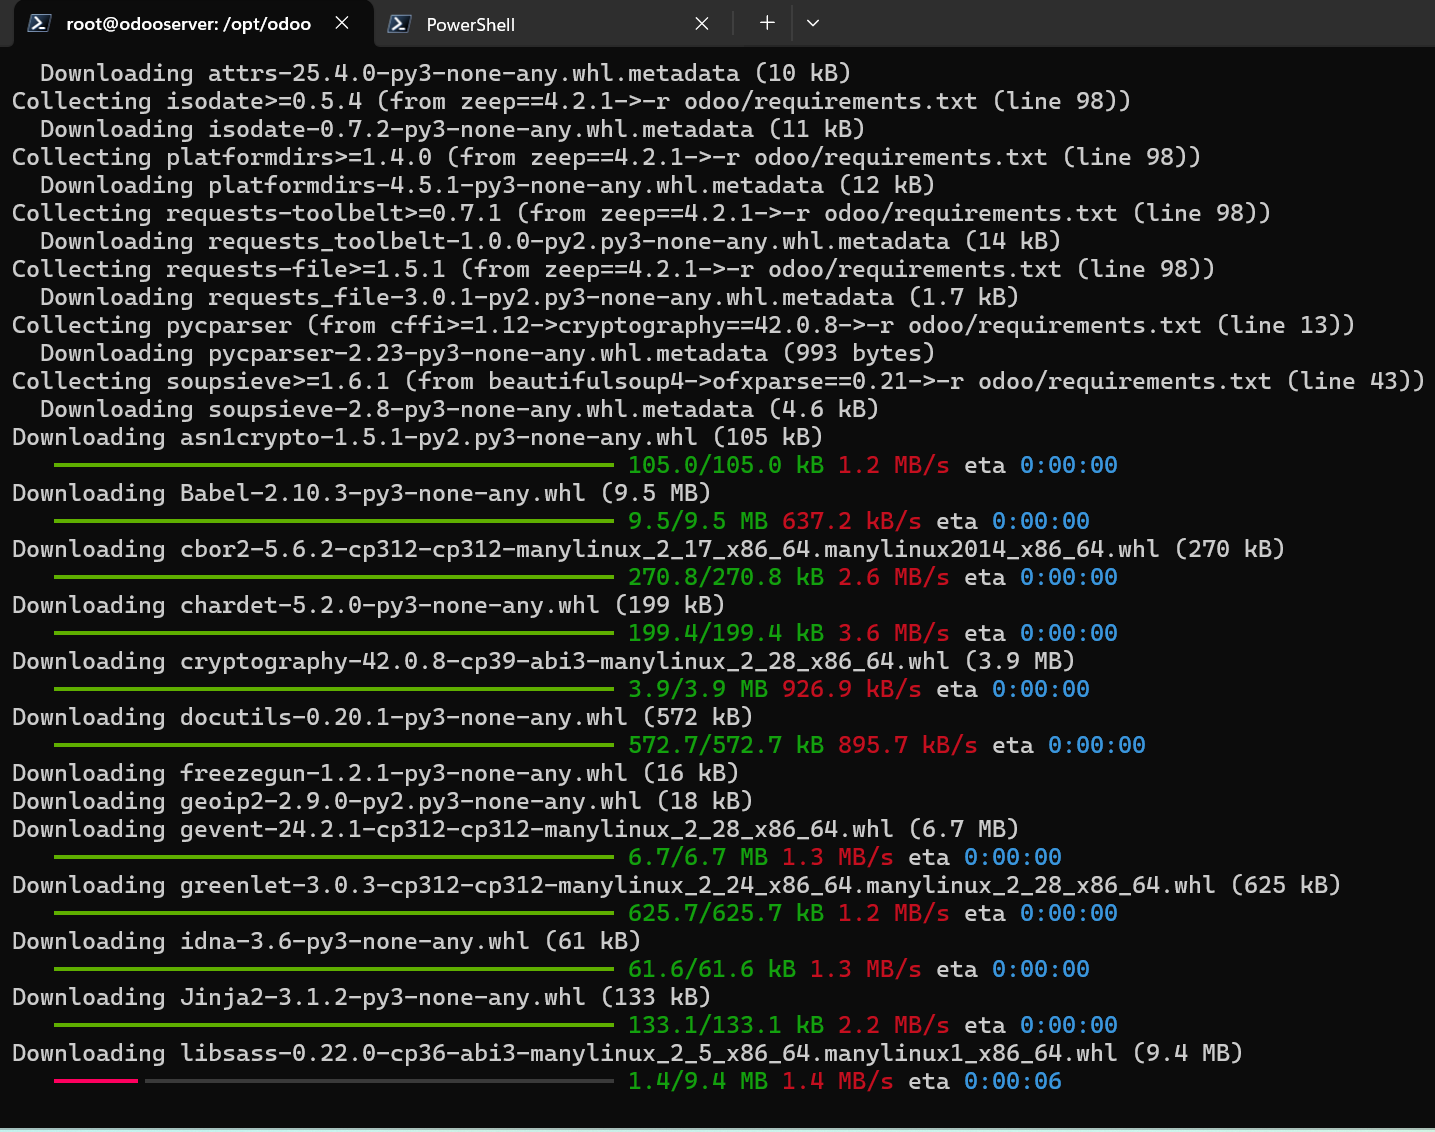
- Install Python Dependencies
Navigate to the Odoo source directory and install Python requirements:
(venv) root@odooserver:/opt/odoo/odoo# pip install -r odoo/requirements.txt
4. Configure Odoo
4.1 Create the Odoo Configuration File
The Odoo configuration file should be created before starting the Odoo service and must be owned by the odoo system user.
Create and open the configuration file:
sudo nano /etc/odoo.conf
|
1 2 3 4 5 6 7 8 9 10 |
[options] ; Path addons addons_path = /opt/odoo/odoo/addons ; Database db_host = False db_port = False db_user = odoo db_password = False ; Log logfile = /var/log/odoo/odoo.log |
Set Correct Ownership and Permissions
Ensure the configuration file is owned by the odoo user:
|
1 2 |
sudo chown odoo:odoo /etc/odoo.conf sudo chmod 640 /etc/odoo.conf |
4.2 Create Log Directory
Odoo requires a dedicated log directory.
|
1 2 |
sudo mkdir -p /var/log/odoo sudo chown -R odoo:odoo /var/log/odoo |
4.3 Create Odoo systemd Service
The Odoo service allows Odoo Community to run as a background service and start automatically on system boot.
Create the Service File
Create and open the systemd service file:
sudo nano /etc/systemd/system/odoo.service
5. Odoo Service Configuration
Add the following content to the service file:
|
1 2 3 4 5 6 7 8 9 10 11 |
[Unit] Description=Odoo After=network.target [Service] User=odoo ExecStart=/usr/bin/python3 /opt/odoo/odoo-bin -c /etc/odoo.conf Restart=always [Install] WantedBy=multi-user.target |
Enable service:
|
1 2 |
sudo systemctl daemon-reload sudo systemctl enable --now odoo |
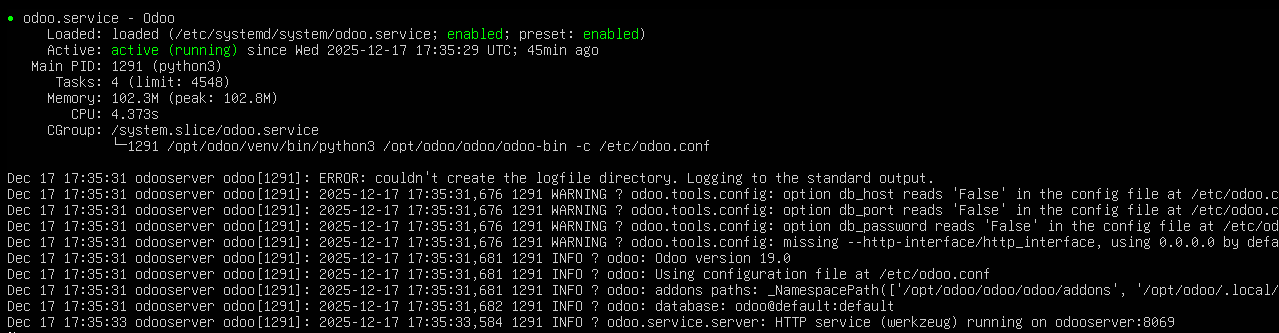
Check Odoo status with command
|
1 |
systemctl status odoo |
6. Accessing Odoo from a Web Browser
After completing the Odoo installation and service configuration, Odoo can be accessed through a web browser.
Access URL
Open a web browser and navigate to: http://192.168.145.134:8069/web/database/selector
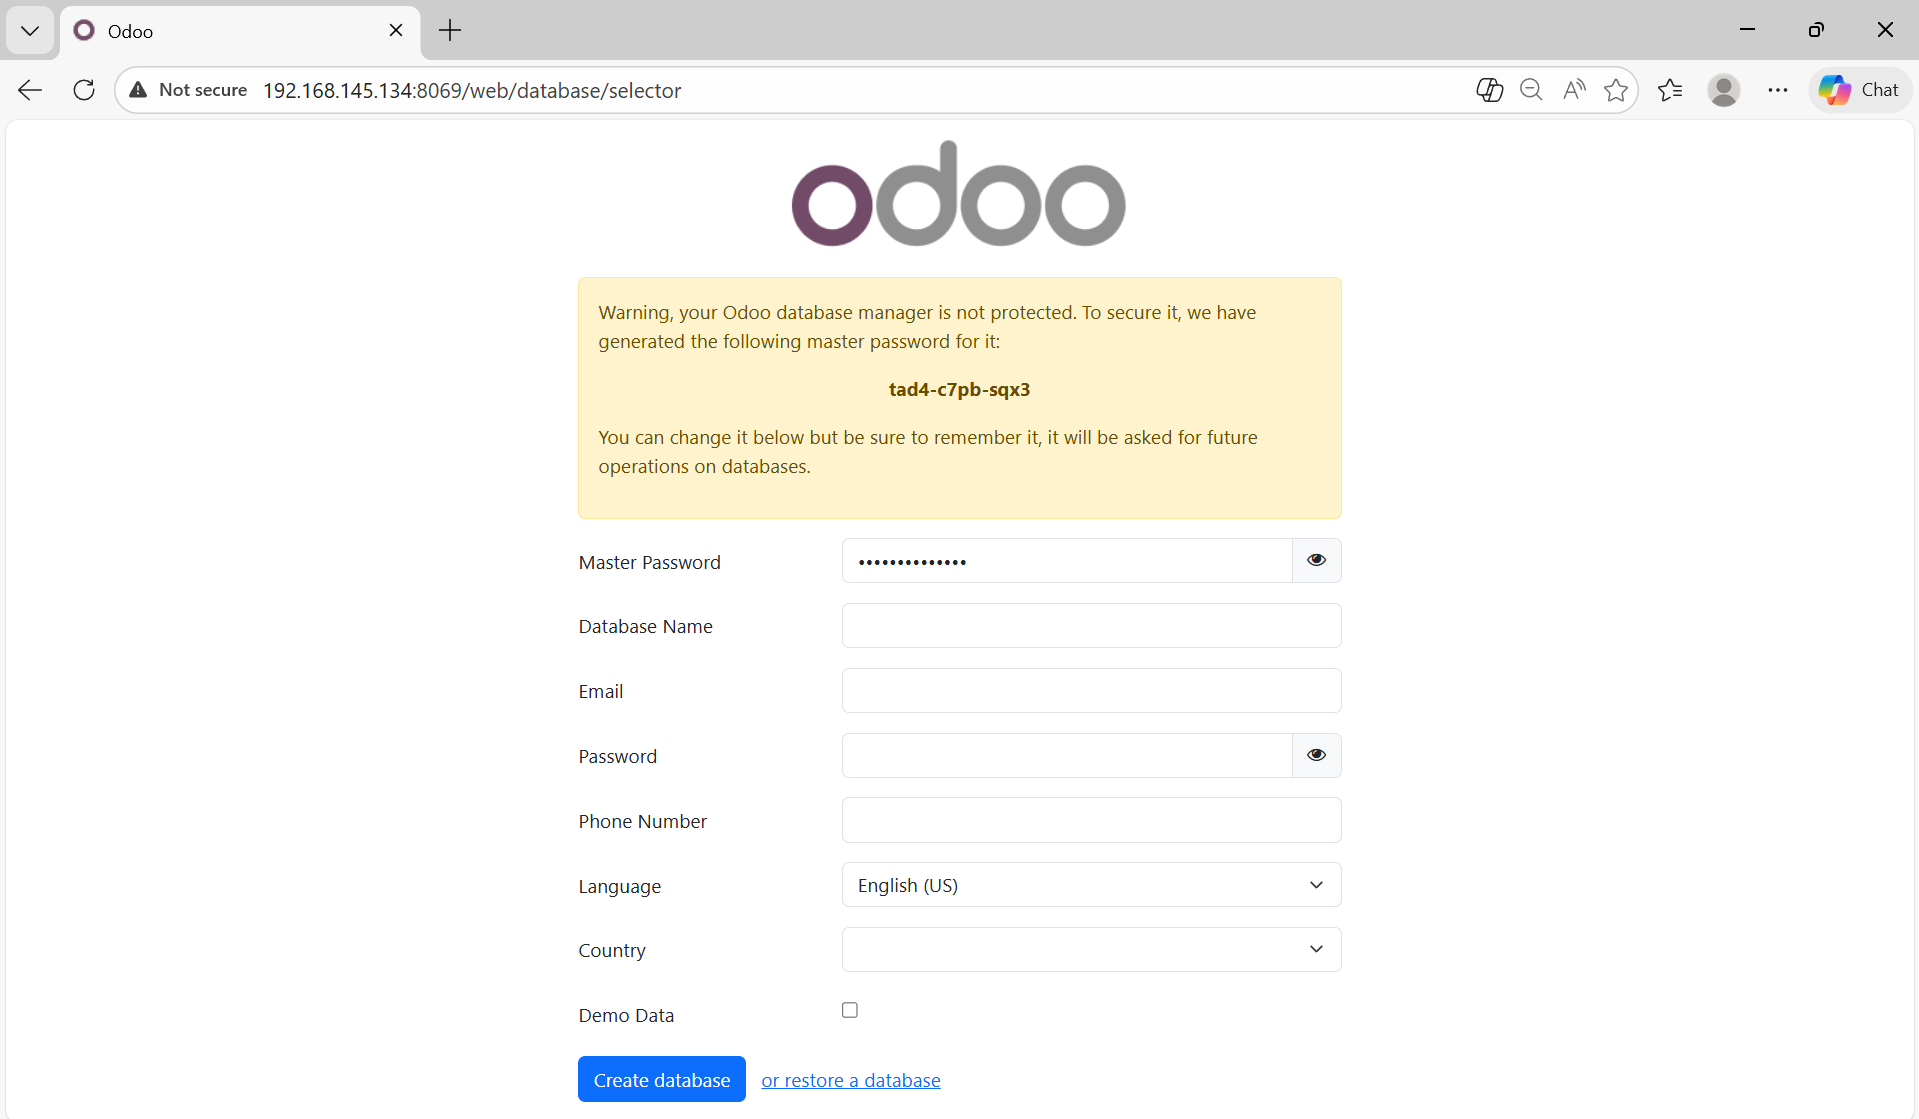
Odoo Initial Database Creation Screen
The displayed page is the Odoo Database Manager interface.
This screen appears automatically when Odoo is accessed for the first time and no database has been created yet.
This confirms that:
- The Odoo service is running correctly
- The application can connect to PostgreSQL
- Network routing and service configuration are working as expected
Explanation of the Warning Message
“Your Odoo database manager is not protected…”
This warning indicates that the Odoo master password (admin_passwd) has not yet been set manually in the configuration file.
Odoo automatically generates a temporary master password:
tad4-c7pb-sqx3
This password is required for:
- Creating databases
- Restoring databases
- Dropping databases
Professional System Administrator Services
I offer comprehensive installation and configuration services to support your IT infrastructure needs, including:
-
Web Server: Installation and optimization to ensure your website runs securely and reliably using platforms such as Apache and NGINX.
-
Mail Server: Deployment and configuration of email servers including Microsoft 365, Carbonio (Zimbra), and Google Workspace.
-
Hosting Control Panel: Installation and setup of modern hosting control panels to simplify server management.
-
Content Management System (CMS): Installation of WordPress, Joomla, or other platforms for efficient content management.
-
Static Web Applications: Setup and configuration of web-based applications tailored to your business needs.
-
Server/Website Migration: Secure data and application migration with no downtime.
 Contact me for consultation or service inquiries.
Email: contact@mursidin.net