Introduction
Every Microsoft 365 deployment begins with a default domain address: yourcompany.onmicrosoft.com. While this serves as a functional entry point, it does not reflect the unique identity of your organization. It is comparable to moving into a new office where the signage displays the landlord’s name rather than your own.
Integrating your custom domain is the essential step of placing your organization’s name on that sign. This process transforms Microsoft 365 from a generic productivity suite into your company’s digital headquarters. By adding a custom domain, you establish professional email addresses, branded collaboration environments, and a unified identity that fosters credibility in every interaction.
This guide provides a comprehensive walkthrough for adding a new domain to your Microsoft 365 tenant, ensuring that your brand is positioned at the core of your digital experience from the outset.
What Does Adding a Domain to Microsoft 365 Entail?
Adding a domain to your Microsoft 365 tenant replaces the default onmicrosoft.com address with your organization’s own domain, such as yourcompany.com. This foundational step enables the use of professional email addresses and ensures that your brand identity is consistently integrated across Microsoft 365 services, including SharePoint and Teams.
The process is centered on verification and configuration. You must first demonstrate ownership of the domain by inserting a designated TXT record into your DNS settings, a critical security measure. Once verification is complete, the domain can be assigned to user accounts for email and linked to Microsoft 365 applications.
This capability also allows for the centralized management of multiple domains or subdomains within a single tenant, supporting diverse departments or brands while maintaining unified administrative control.
Benefits of Adding a Custom Domain to Your Microsoft 365 Tenant
Integrating a custom domain into your Microsoft 365 tenant delivers far more than a simple change of email address. It is a strategic enhancement that transforms your digital workspace and strengthens your organizational identity. The following are the key advantages:
- Professional Branding and Credibility
A custom email address immediately elevates your professional image. It reinforces brand identity in every communication and builds trust with clients, partners, and stakeholders, replacing the generic onmicrosoft.com domain with your own. - Centralized Administration and Control
By adding a domain, all core Microsoft 365 services operate under a unified identity. This streamlines administration, simplifies management, and ensures a consistent experience across your organization. - Enhanced User Experience
Custom domains provide seamless login and collaboration. Employees access Microsoft 365 applications using credentials that match their company email, reducing confusion and improving workflow efficiency. - Improved Security and Integration
Using your own domain grants greater control over DNS and security policies. It also enables deeper integration with services such as Exchange Online and Microsoft Teams, ensuring your brand is consistently represented across all platforms.
Prerequisites Before Adding a Domain to Microsoft 365
Before initiating the process of adding a custom domain to your Microsoft 365 tenant, several requirements must be met to ensure a smooth and successful configuration. Preparing these items in advance helps prevent common issues and delays.
- Administrative Access to the Domain
You must own the domain you intend to add or have full administrative rights to manage it. Ownership verification is essential to prevent unauthorized use of domains. - Access to DNS Settings
– Ensure you have login credentials for your domain registrar or DNS hosting provider.
– You will need to add or modify DNS records (TXT, MX, CNAME, SRV) during the setup. - Microsoft 365 Administrator Permissions
– Your Microsoft 365 account must have Global Administrator or Domain Name Administrator privileges.
– Without these roles, you cannot add or configure domains in the tenant. - Domain Verification Plan
– Microsoft requires proof of ownership via a TXT record (or sometimes an MX record).
– This record must be added to your DNS settings exactly as provided by Microsoft.
– Verification ensures that only authorized administrators can link a domain to Microsoft 365. - Technical Preparation
– Understand that DNS changes are not instantaneous; while many propagate within minutes, full propagation can take up to 48 hours.
In this tutorial, the default DNS configuration will be customized to use the subdomain project.mursidin.net. This adjustment ensures that all Microsoft 365 services and records are aligned with the designated subdomain, providing a consistent and professional identity across email, collaboration tools, and administrative settings.
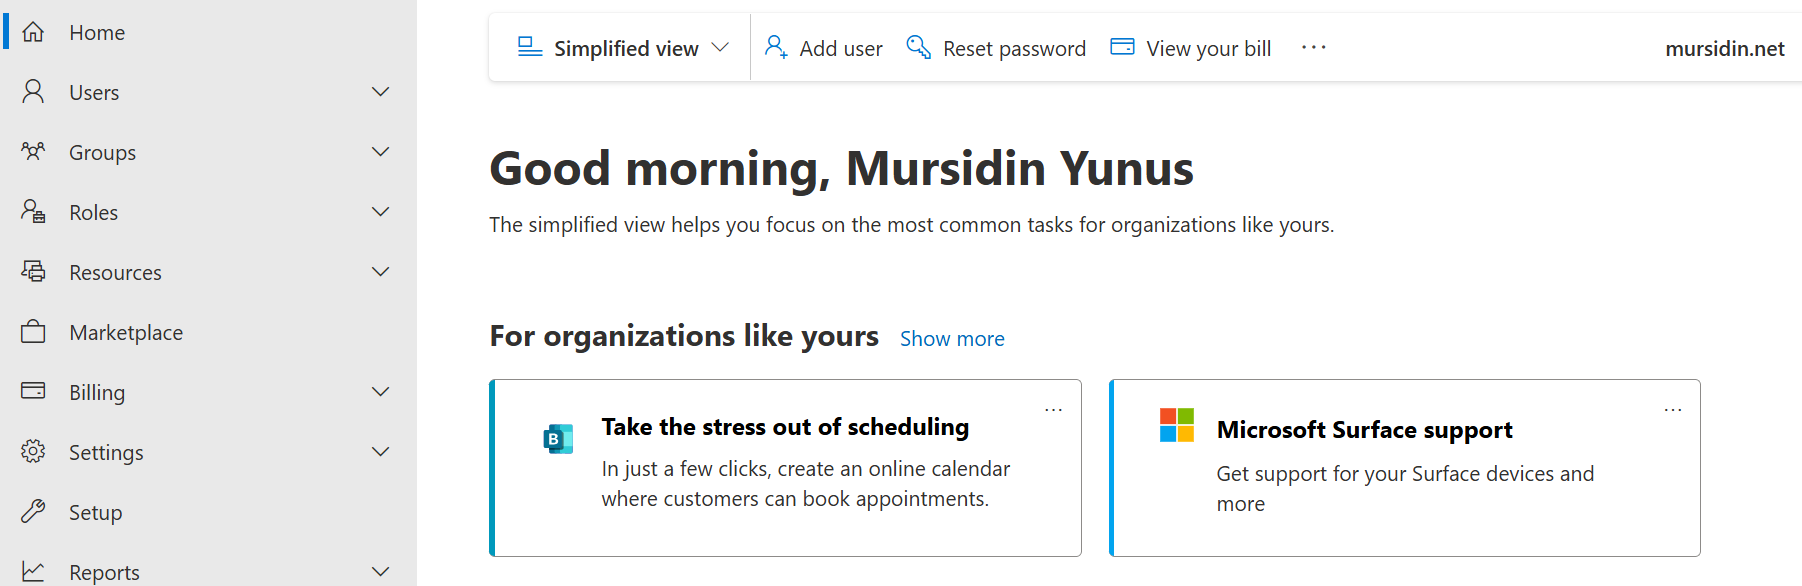
Step 1: Sign in to the Microsoft 365 Admin Center
Begin by logging into the Microsoft 365 Admin Center.
You must use an account with Global Administrator privileges, as only this role has the necessary permissions to add and configure domains within your tenant.
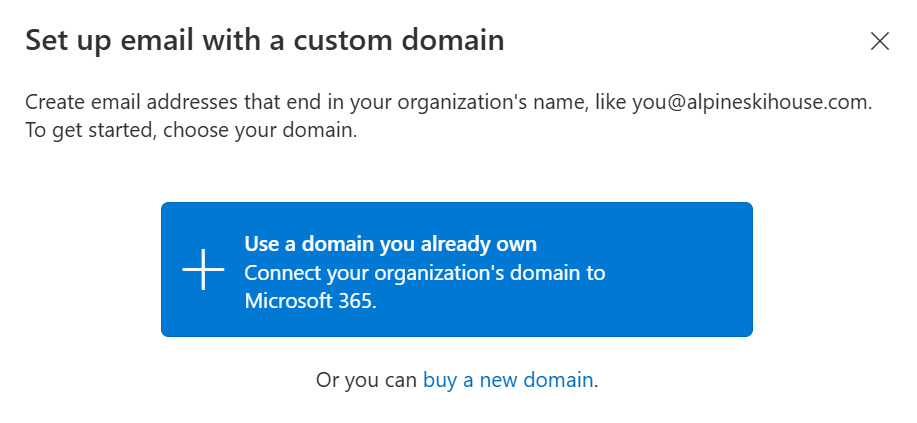
Step 2: Add a New Domain to Your Microsoft 365 Tenant
After signing in to the Admin Center, navigate to Settings → Domains.
Select Add Domain to initiate the setup wizard. This wizard serves as the entry point for configuring your custom domain within Microsoft 365. Beginning here ensures that the domain integration process is properly structured and aligned with Microsoft’s recommended procedures.
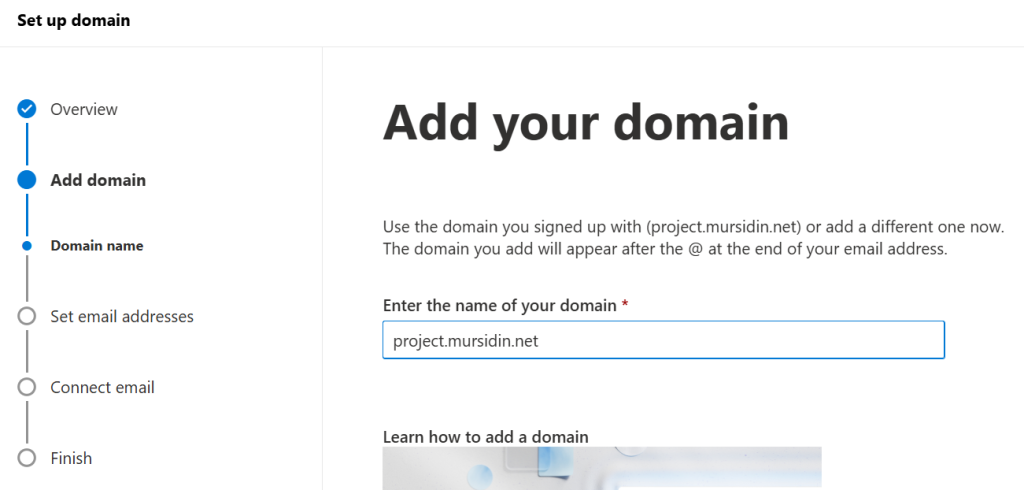
Step 3: Enter and Confirm Your Custom Domain Name
Within the setup wizard, you will be prompted to provide your custom domain name. Enter the full domain (for example, project.mursidin.net) and carefully review the entry for accuracy. This domain will serve as the foundation for your organization’s professional email addresses, service URLs, and collaboration environments. Ensuring precision at this stage is critical, as any errors may affect the functionality of Microsoft 365 services linked to the domain.
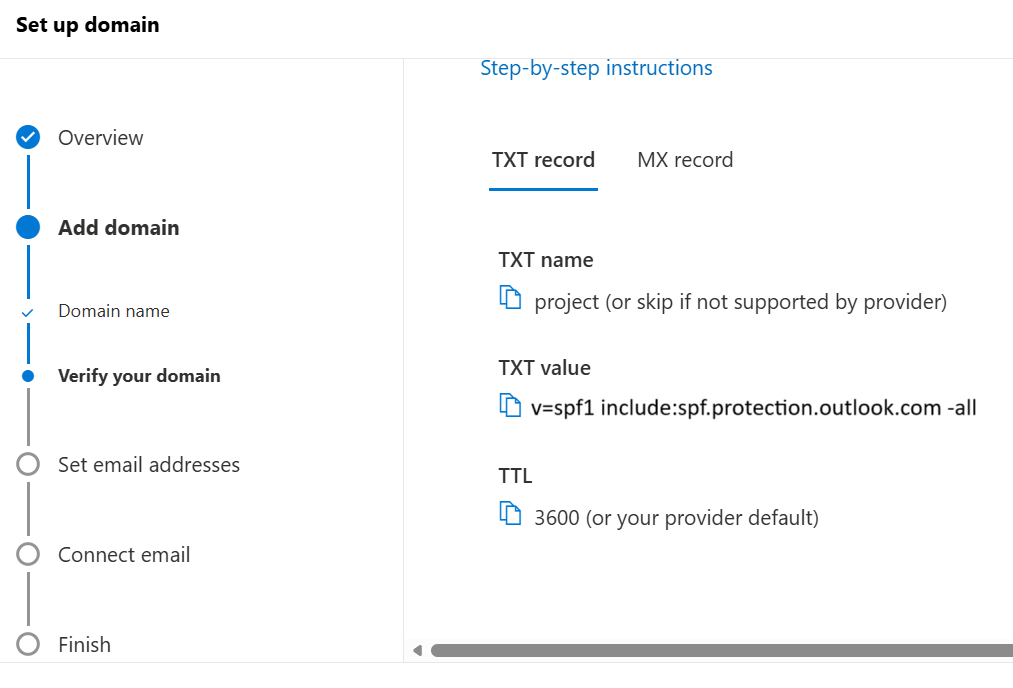
Step 4: Verify Domain Ownership (TXT and MX Record Verification)
To establish that you are the rightful owner of the domain, Microsoft requires verification through a DNS record. A unique TXT record and MX Record will be generated for this purpose.
- Log in to your domain registrar’s DNS management portal.
- Add the TXT record exactly as provided by Microsoft to your domain’s DNS settings.
- Return to the Microsoft 365 Admin Center and select Verify to confirm ownership.
This verification step is a mandatory security measure. It ensures that only authorized administrators can associate the domain with Microsoft 365 services, thereby protecting against unauthorized use or misconfiguration.
Setup TXT Record
Configuration on Microsoft 365 | Configuration on DNS Hosting (Alibaba Cloud) |
| 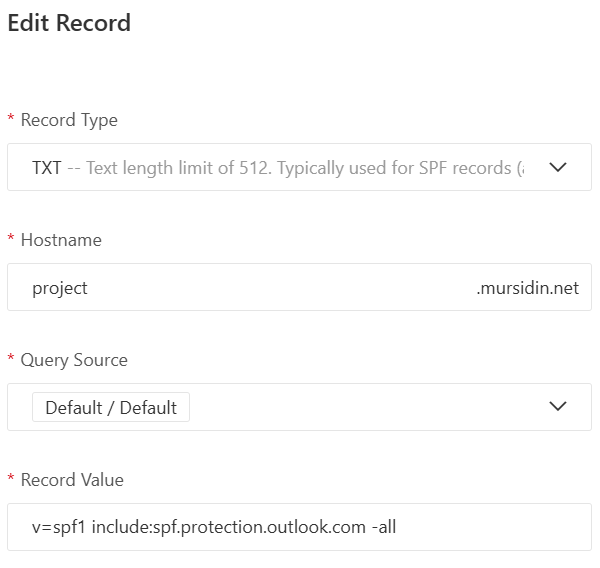
|
Setup MX Record
Configuration on Microsoft 365 | Configuration on DNS Hosting (Alibaba Cloud) |
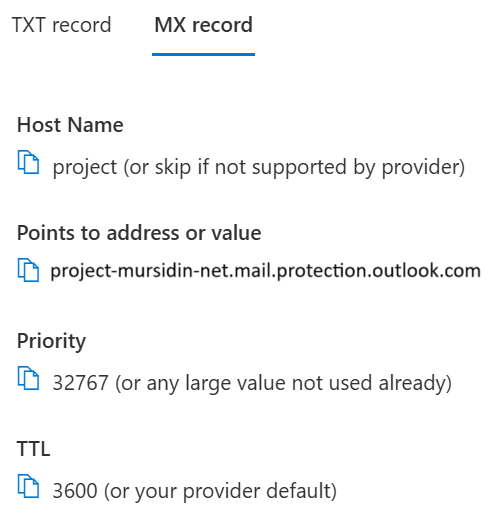
| 
|
Adjust the above settings in your DNS server configuration.
Step 5: Complete Domain Setup and Activate Services
After all required DNS records have been added and successfully propagated, return to the Microsoft 365 Admin Center to finalize the configuration.
- Confirm that the domain status shows as verified and active.
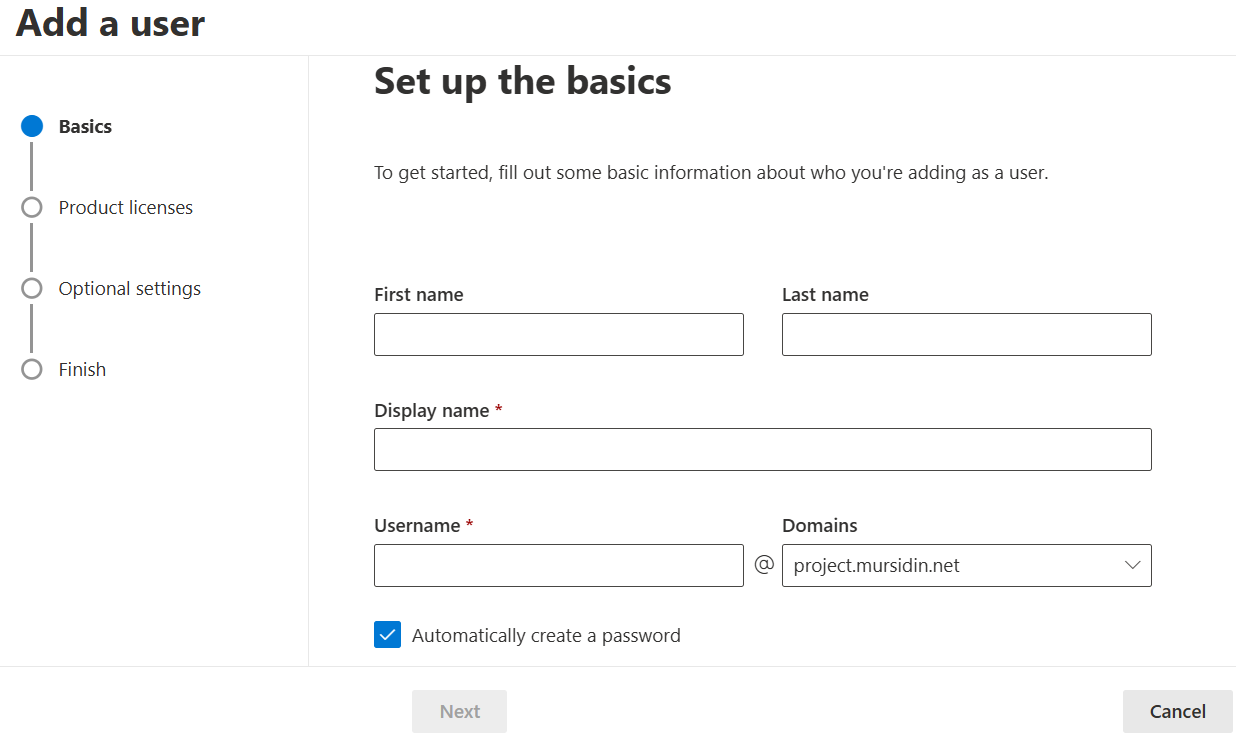
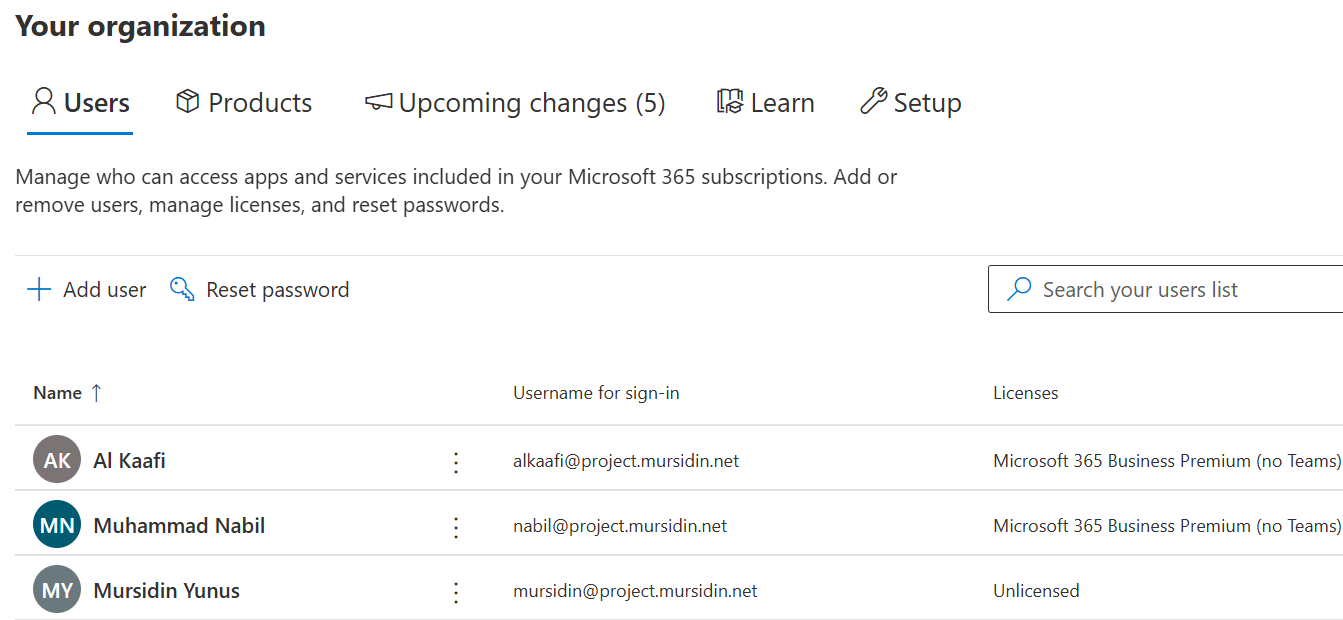
- Assign the new domain to user accounts, enabling professional email addresses that reflect your organization’s identity.
- Integrate the domain with Microsoft 365 services such as Exchange Online, SharePoint, and Teams, ensuring that collaboration and communication tools operate under the unified domain
Leave a Reply