Introduction
In modern web management, subdomains are an effective way to separate specific services or features from the main domain. For example, you might create blog.example.com for blog content or app.example.com for a web application. By leveraging NGINX as a web server, configuring subdomains becomes both flexible and efficient.
NGINX is widely recognized for its lightweight architecture, high performance, and robust reverse proxy capabilities. When hosting subdomains, NGINX allows you to:
- Direct subdomains to different directories or applications.
- Configure virtual hosts for each subdomain.
- Optimize performance and security through proper configuration.
This guide will walk you through the process of creating a subdomain using NGINX, covering DNS preparation, server block configuration, and testing to ensure the subdomain is accessible and functioning correctly.

Topology Explanation
1. Access Flow
-
Internet → NGINX Server
All incoming requests from visitors are routed to the NGINX server, which acts as both a reverse proxy and a web server.
- Public DNS
Subdomains such as
portfolio.mursidin.netandproject.mursidin.netare resolved by public DNS to the server’s IP address.
2. NGINX Server
Primary Role
Handles HTTP (port 80) and HTTPS (port 443) requests and performs routing based on server blocks (virtual hosts).
- Server Block Structure
portfolio.mursidin.net→ root directory:/var/www/portfolio.mursidin.netproject.mursidin.net→ root directory:/var/www/project.mursidin.net
- Directory Configuration
Each root directory must contain anindex.html or index.phpfile or the appropriate web application files.
Initial Preparation
Prerequisites
- Root or sudo access to the server
- NGINX installed and properly configured
- Active domain or subdomain pointing to the server’s IP address
- Certbot installed for SSL certificate management
Creating the Web Directory
|
1 2 3 4 5 |
sudo mkdir -p /var/www/portfolio.mursidin.net sudo mkdir -p /var/www/project.mursidin.net echo "<h1>Portfolio Site</h1>" | sudo tee /var/www/portfolio.mursidin.net/index.html echo "<h1>Project Site</h1>" | sudo tee /var/www/project.mursidin.net/index.html |
Configuration File
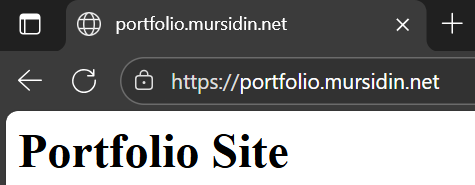
Create a dedicated server block for the subdomain portfolio.mursidin.net:
|
1 |
sudo nano /etc/nginx/sites-available/portfolio.mursidin.net |
Contents of file configurations:
|
1 2 3 4 5 6 7 8 9 10 11 12 13 14 15 16 17 18 19 20 21 22 23 24 25 26 27 28 29 30 31 |
server { listen 80; server_name portfolio.mursidin.net; root /var/www/portfolio.mursidin.net; index index.html index.php; location / { try_files $uri $uri/ =404; } # Redirect HTTP to HTTPS return 301 https://$host$request_uri; } server { listen 443 ssl; server_name portfolio.mursidin.net; root /var/www/portfolio.mursidin.net; index index.html index.php; ssl_certificate /etc/letsencrypt/live/portfolio.mursidin.net/fullchain.pem; ssl_certificate_key /etc/letsencrypt/live/portfolio.mursidin.net/privkey.pem; include /etc/letsencrypt/options-ssl-nginx.conf; ssl_dhparam /etc/letsencrypt/ssl-dhparams.pem; location / { try_files $uri $uri/ =404; } } |
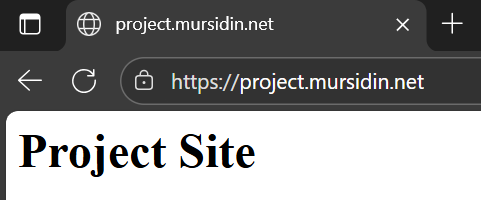
Create a dedicated server block for the subdomain project.mursidin.net:
|
1 |
sudo nano /etc/nginx/sites-available/project.mursidin.net |
|
1 2 3 4 5 6 7 8 9 10 11 12 13 14 15 16 17 18 19 20 21 22 23 24 25 26 27 28 29 30 31 |
server { listen 80; server_name project.mursidin.net; root /var/www/project.mursidin.net; index index.html index.php; location / { try_files $uri $uri/ =404; } # Redirect HTTP to HTTPS return 301 https://$host$request_uri; } server { listen 443 ssl; server_name project.mursidin.net; root /var/www/project.mursidin.net; index index.html index.php; ssl_certificate /etc/letsencrypt/live/project.mursidin.net/fullchain.pem; ssl_certificate_key /etc/letsencrypt/live/project.mursidin.net/privkey.pem; include /etc/letsencrypt/options-ssl-nginx.conf; ssl_dhparam /etc/letsencrypt/ssl-dhparams.pem; location / { try_files $uri $uri/ =404; } } |
Activate the virtual host
|
1 2 |
sudo ln -s /etc/nginx/sites-available/portfolio.mursidin.net /etc/nginx/sites-enabled/ sudo ln -s /etc/nginx/sites-available/project.mursidin.net /etc/nginx/sites-enabled/ |
Test and reload
|
1 2 |
sudo nginx -t sudo systemctl reload nginx |
Add DNS Record
|
1 2 3 4 |
Subdomain | Type | IP Server ----------------------------------- portfolio | A | xxx.xxx.xxx.xxx project | A | xxx.xxx.xxx.xxx |
Note : xxx.xxx.xxx.xxx is your ip DNS public
Test and Validation
Open the web browser and access https://portfolio.mursidin.net
Also access web https://project.mursidin.net/